Are you struggling to find a free remote desktop solution that doesn’t require an annual subscription? RustDesk fits the bill.
If you’ve been thinking about using RustDesk, this article will step you through the process.
Let’s get started.
What is RustDesk
RustDesk is an open-source remote control software that allows users to control, view, chat, and transfer files to and from a PC or person at a distance. It offers an easy way to connect to any device regardless of the operating system (macOS, Android, Windows, Linux, iOS) or platform (mobile, mini-pc, desktop, or server). There are many good reasons to use remote desktop software.
Step 1 Set up the remote computer
The first step is to set up the RustDesk on the remote machine
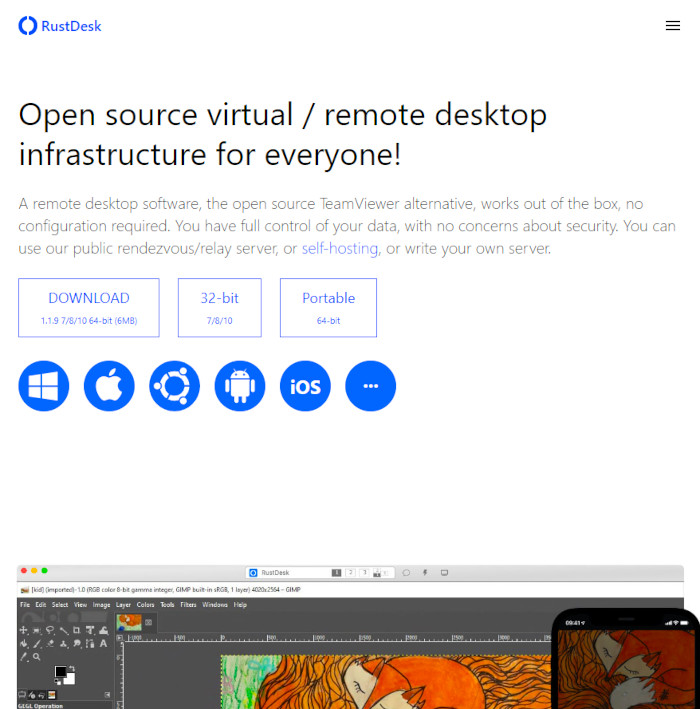
Navigate to RustDesk’s website and select the download for the operating system on the remote computer. In my case, it is a Windows 10 PC. Note that RustDesk will detect your operating system and show you the best option.
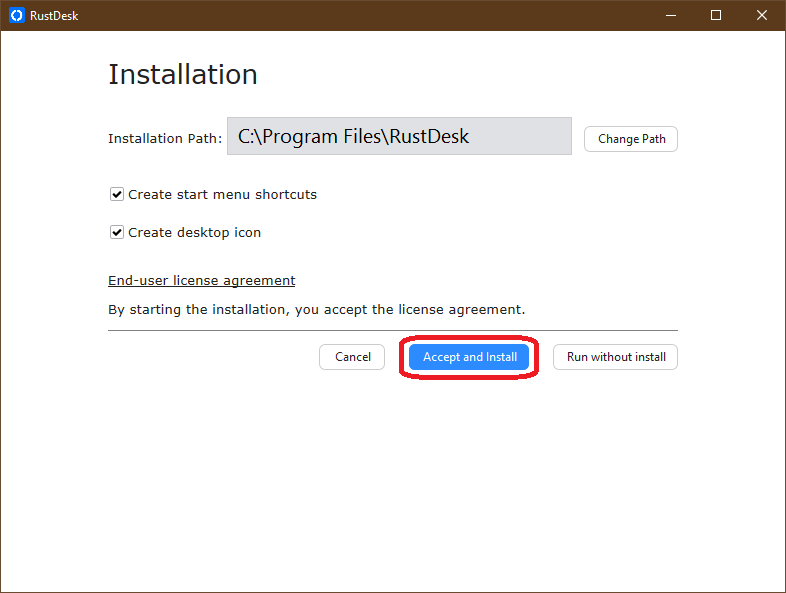
Once downloaded, unzip the file and install it on the remote computer. You can choose to install it or run it without installation. Keeping the default will simplify the process.
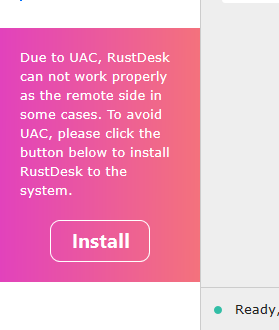
If you choose to not install the software, you will need to install and allow User Access Control (UAC) on Windows.
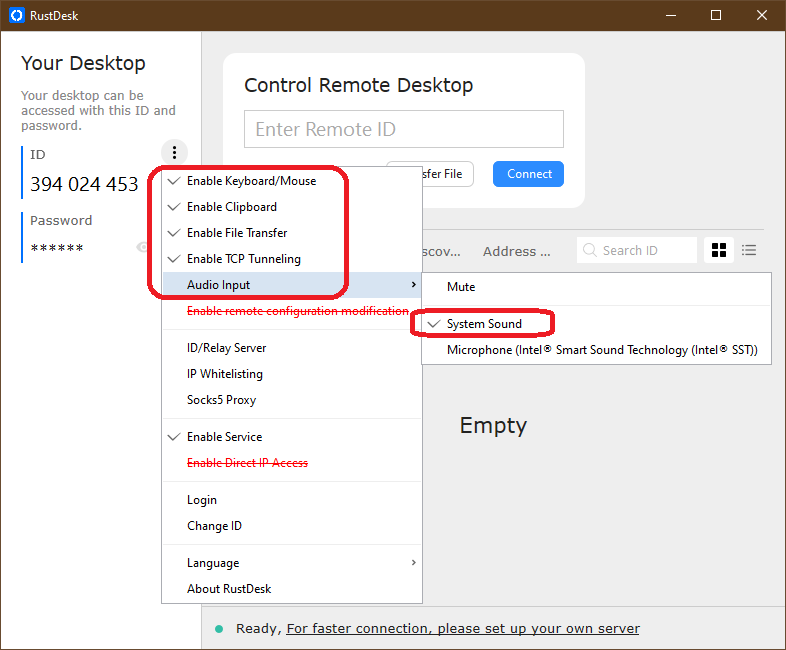
To allow remote control of the machine’s peripherals and services, enable them and system sound too.
Step 2 Set up Local Client
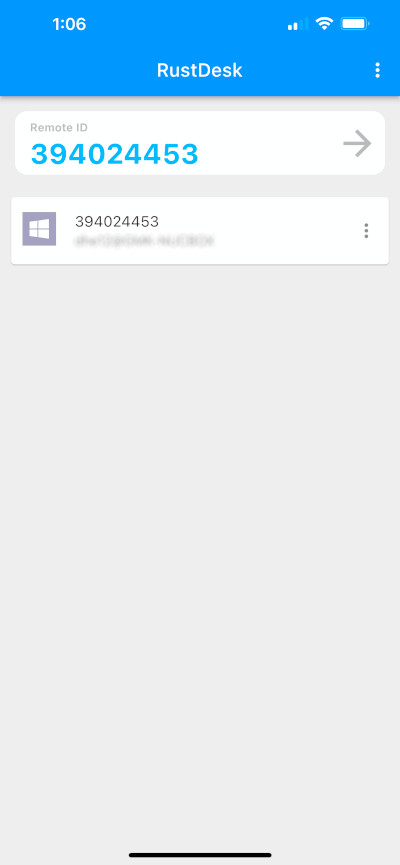
The next step is to set up the remote client. This is the computer that will access the remote computer. In my case, I will use an iPhone. The mobile app can be in both Google Play store and Apple’s App store. Download and install the application.
Step 3 Create and Share Password
RustDesk relay server will create a unique ID for the remote PC. It will also create a default secured password that you can modify. Share both the ID and password with the client.
Step 4 Connect
Enter the ID of the remote computer. You will be prompted to enter the password.The remote computer will be asked to accept the request the first time.
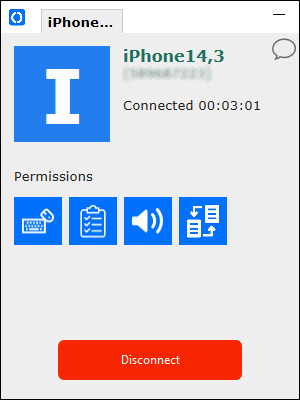
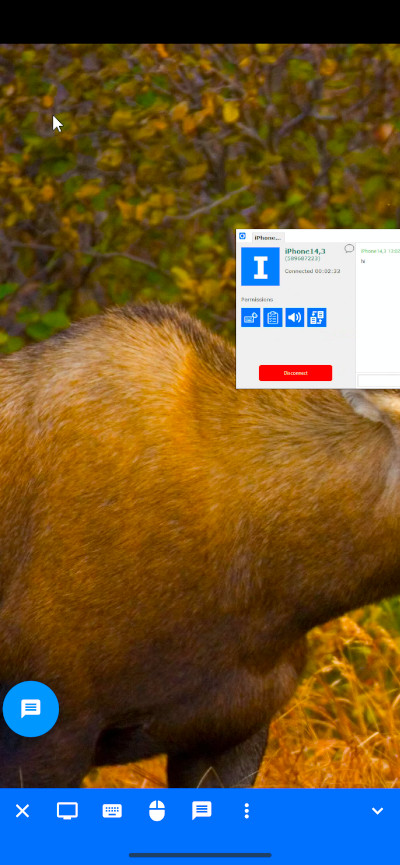
The client and server are now connected. You can control the remote computer using the controls at the bottom of the client’s screen.
Step 5 Adjust the Display
The client device can control the remote computer. There are a number of controls available to improve the experience. Select the monitor icon to display the options..

The top section of the configuration dialog contains controls to change the way the remote desktop is displayed locally. You can change it to resize it to fit the local screen, stretch it to fit every pixel on the client, or keep it unchanged (you’ll have to scroll around to see it).
The middle section controls modify the way the remote screen is displayed locally. You can change the resolution to accommodate the bandwidth of the connection. The Good Image Quality parameter will improve the quality of the display but requires a faster connection. If the bandwidth is too low, it will slow down interaction. The Optimize Reaction Time will reduce the image quality but will improve speed and responsiveness.
If it turns out that the performance is not sufficient for your needs, RustDesk recommends hosting your own relay server on your own server.
If you want the remote screen to blank so that the remote screen cannot be viewed, select Privacy mode.
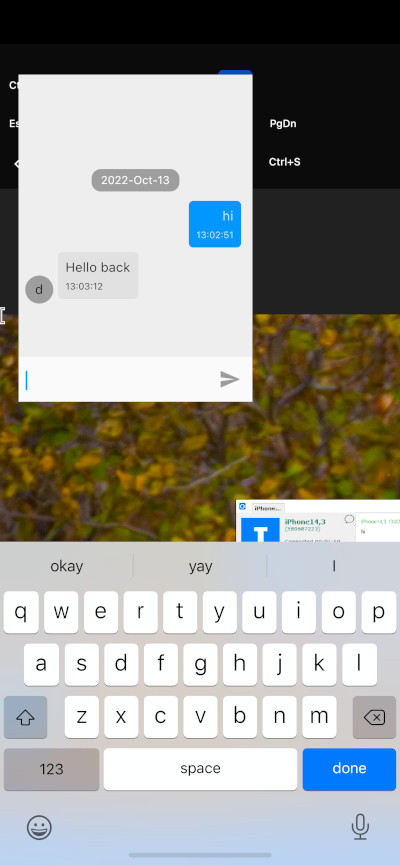
Step 6 Chat
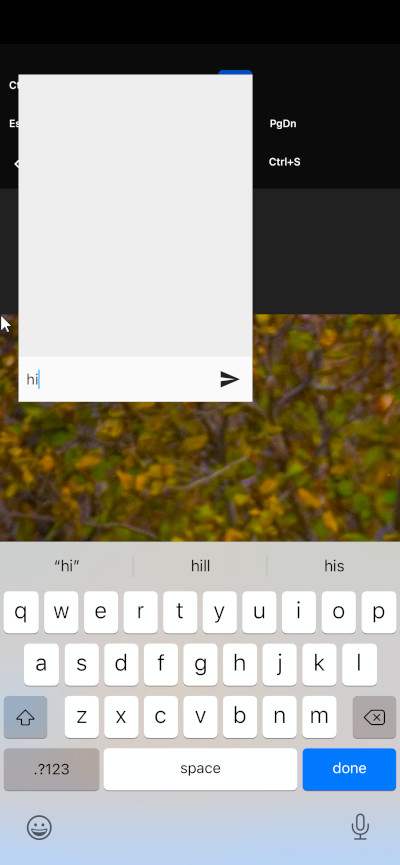
Selecting the text icon will open up the keyboard and allow you to chat with a person on the remote computer.
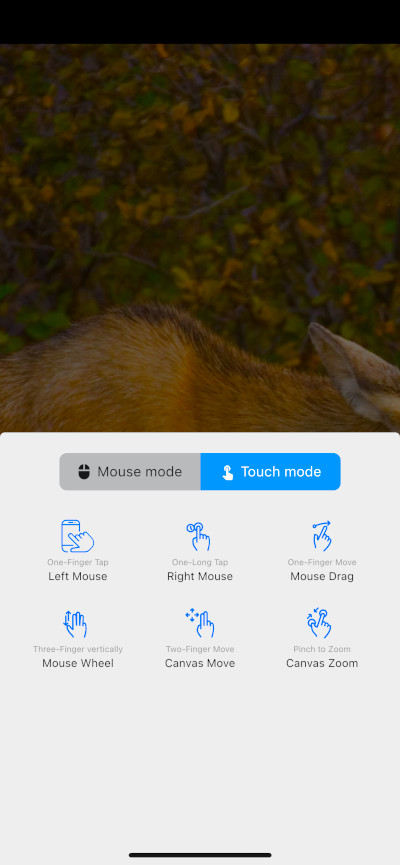
Step 7 Control the Screen
RustDesk offers the ability to control the remote screen with gestures or simulate the control of a mouse.
Conclusion
In this post, I’ve presented a step-by-step guide on how to install and use RustDesk and control a remote Windows PC from an iPhone. If you have the need for an open-source, free remote desktop software, take a look for yourself and download a copy. It might fit your needs as well as it does for me.


